InfoCenter

Pän::The Board
Latest ver. 1-0-32
in MS Store
New to Go?
Visit Beginner's Lounge
InfoSite
Sensei's Library
Life in 19x19
OGS
Go content creator?
Consider Scenario!
“Scenario” is a special game tree structure that has protected part as ‘definition’ and user added part as ‘resolution’. It might be useful tool for lecturer or Go content creator. The concept and use is explained with a sample as below:
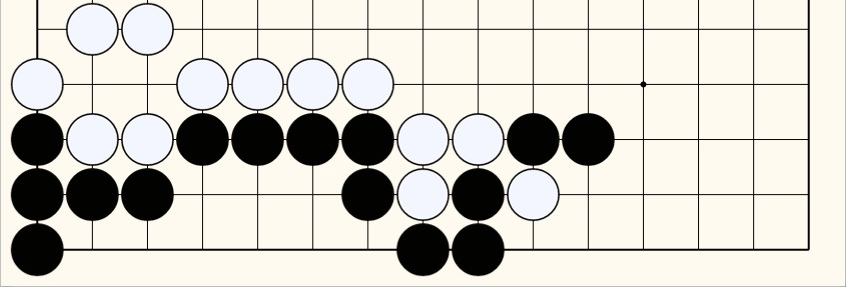
Figure shows an example of a ‘Life and Death’ puzzle. White moves first, as initial condition, and is requested to capture the black stones.
User may try some moves over the given stone layout and consider the effective move sequence to achieve the request. When doing so, the given stone layout above has to keep its original form, and user only needs to add or remove stones on the board for evaluation. The found stone move sequence could be more than one and they all have to be recorded and reviewed.
Assumed the sample file, Sample_GBF_1_File.gbf, is open in the app. To get started, find the game title ‘Life and dead in Regular form’ from the top of the app combo box or from the InfoViewer, and read it.
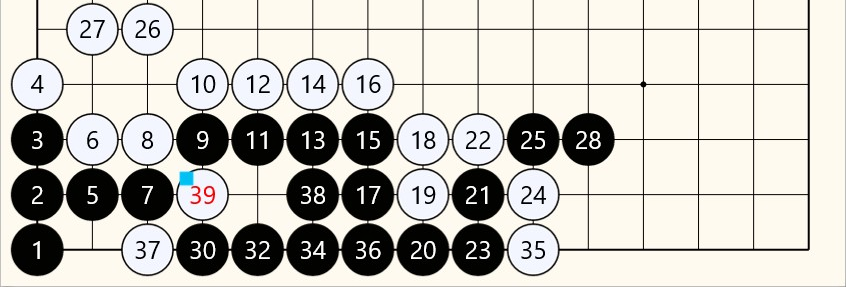
Stone is displayed from #1 to #39 as shown.
Move back to stone number 28. Use traverse button or just type the number in the edit box as shown and enter.

The board has to be shown as below.
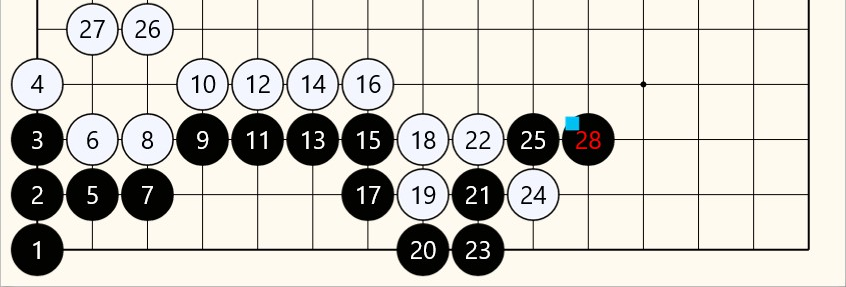
Now is ready to create a ‘Scenario’ game tree. Click the button ‘Scenario’  from the status bar of the app.

Click ‘Yes’ when a dialog box is shown.
And, the stone layout is displayed as below:
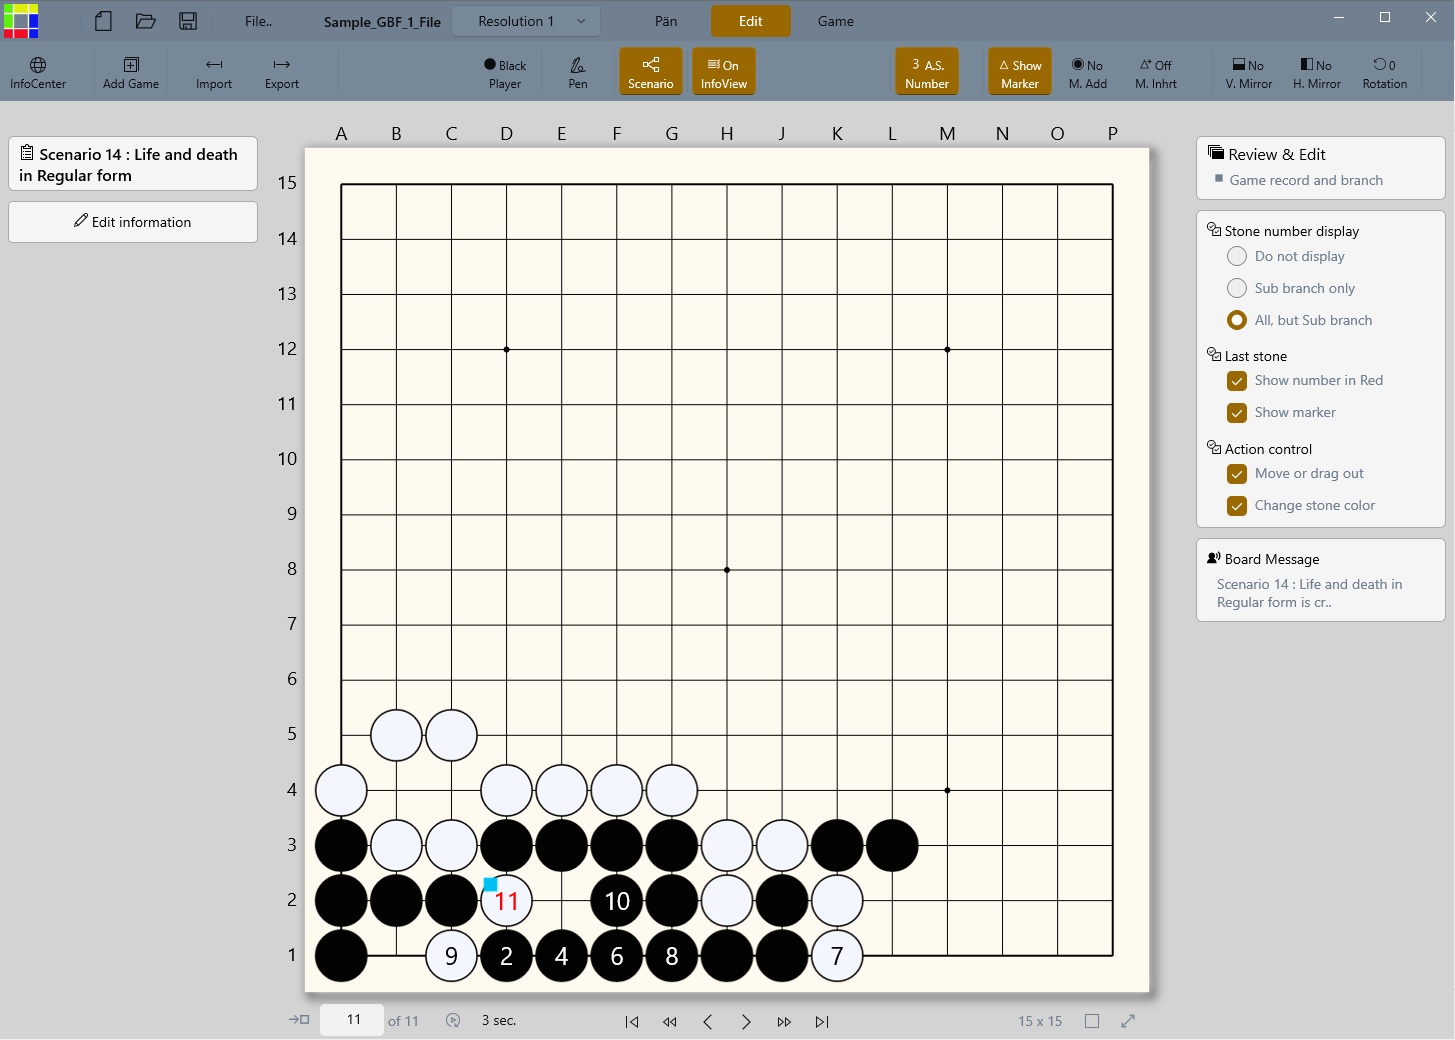
As shown, the stone layout has been modified without the stone number(#1-#28) and the rest with revised stone number from the original.
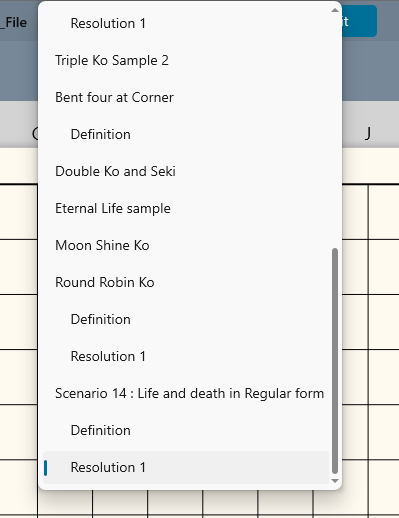
Chek out where is the newly created ‘Scenario’ game tree from the combo box of the app or use ‘InfoView’ window. Scroll down to the end and find it with the automatically assigned game title as “Scenario 14 : Life and death in Regular form”.
 |
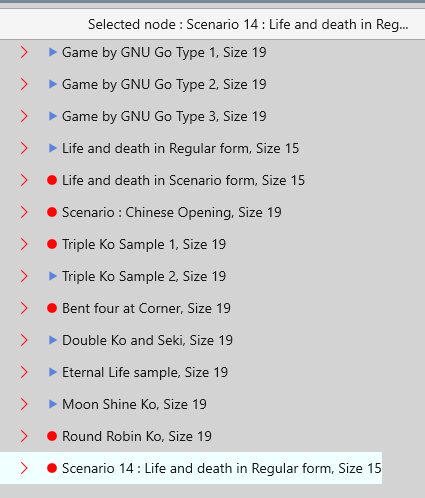 |
See that the board is currently reading “Resolution 1” from the game tree. That is, stones from #1 to #28 of original game tree is revised to the “Definition” of the newly created scenario game tree and the rest from #29 to #39 is transformed to “Resolution 1”.
Go back to the board. And, click the button ‘Edit Information’ at the bottom of left panel.
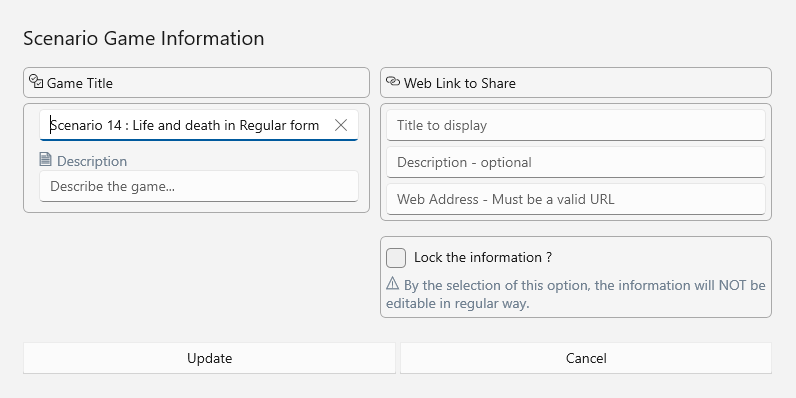
Put and/or revise the information in the box. When finished, click ‘Update’ and ‘Save’.
Watch out! Do not check the box ‘Lock the information ?’ until the information is finalized. Or, the information can not be editable.